✯ This site uses affiliate links – Full Affiliate Disclosure
If you are looking for a low-cost but really fantastic and versatile craft project to do on a rainy day, look no further. DIY glass magnets are one of the easiest things to make, but are very rewarding to do and can go really fast once you get the basic techniques down.
These types of projects can be done alone or with others. It would be a fun project to do with kids – as long as you are supervising and making sure the supplies used are kid-friendly.
Glass magnets (or push pins or garden stakes) are so easy to DIY and they come out beautiful!
You can create them as a product to sell at craft fairs or online on places like Etsy, or you can just make them to give as gifts. They make excellent gifts for men, women, kids, teachers, or just about anyone for any occasion.
What You Will Need to Make Glass Magnets:
- Glass Cabochons or Clear Glass Filler Gems (floral vase gems)
- Magnets or Thumb Tacks
- Clear Glue – I use E6000
- Scissors
- q-tips
- wood paint sticks (if you are wanting to make garden stakes)
- scrapbook paper or magazines or photographs or stickers for background images – if you don’t have any magazines you can find something neat at Pexels.com and print it.
Depending on the supplies you already have, this is a project that you can probably complete for under $20 or so.
Step 1: Find Images
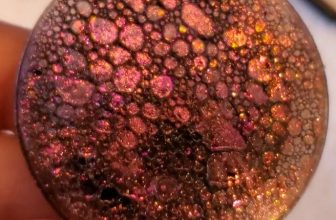
These can be any images. You can get them from a magazine, catalogue, photograph, sticker, or even just pretty font from an advertisement. I also used a plain backing to make a few of these with just glittery nail polish, and those came out great.

You could also use some interesting textures like a crumpled piece of aluminum foil as your backing.
Step 2: Cut the Images Down
Whatever you decide on using, make a small piece of it so that it’s easier to work with. Using scissors, trim a snippet of your image down to slightly bigger than your glass cabochon will be, being mindful of how you want to center the glass stone on top of it. Make sure there is enough room to center the main focal point of your image.

Step 3: Glue Your Image to Your Stone
Using just enough to be effective, place a drop of glue on the center of your glass stone (cabochon).
Now, firmly squish the stone onto the image, spinning it slightly back and forth to flood the glue to the edges of the stone.
Make sure you use enough glue so that it extends out to the edges when pushed on, but try not to use so much that excessive amounts are squeezing out.
The goal is to avoid making a complete mess but make sure you are getting the entire glass area covered.

Step 4: Clean any Excess Glue
If you have a lot of glue coming out on the sides, use a q-tip to wipe it up.

Step 5: Trim the Paper Off
Wait about an hour or so until the glue is mostly dry. Once it is, using scissors, go around the edges and cut off any excess paper that is hanging over. Try to get all the pointy edges so that you have a smooth, round backing paper.

Step 6: Glue on the Backing
Following the same principles as the prior steps for gluing, adhere the glass piece to either a magnet, tack, or wood stick, depending on what you are trying to achieve.
Use enough glue to be effective, but do not go too heavy with the glue here either. You want to create good adhesion without making a complete mess.
Make sure your backing is properly centered – sometimes magnets or pins can shift a bit, so make sure it is fairly well centered after a couple of minutes of drying.
Tip: Don’t let the magnets sit too close together or they might attach to each other.

Step 7: Let it Dry Overnight
Your piece will probably be completely done after 24 hours depending on what glue you use. Make sure it is completely dry before giving it as a gift or using it.

Step 8: Optional – Packaging
If this is a gift or something that will be sold, you might opt for some cute packaging to enhance the appeal. You could place these in a tin or a plastic box that would make these look even cuter than they already are.
Otherwise, your magnets/pins/stakes are COMPLETE!
What a fun and easy thing to make!!
If you’d like to see me making mine, watch the video below:
Video Tutorial
How to Make Glass Magnets in 7 steps – FUN DIY
DIY Magnet Tutorial
I hope you gave these a try and enjoyed them as much as I did.
If you want to make magnets that look like dragon scales, check out this post.

If you need other ideas for fun things to do, check out this other post.

Thanks for visiting!